> ## Documentation Index
> Fetch the complete documentation index at: https://docs.qontext.ai/llms.txt
> Use this file to discover all available pages before exploring further.
# ChatGPT
> Connect Qontext to ChatGPT
Connect Qontext to ChatGPT via MCP to use your context repository in ChatGPT conversations.
With Qontext + ChatGPT, you can:
* Automatically pull relevant, up-to-date context for every prompt
* Keep full governance and permissions in Qontext
***
## Installation
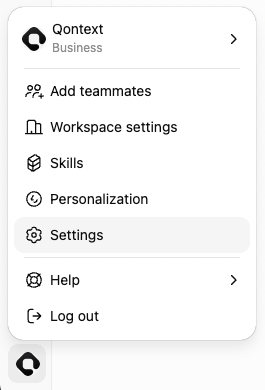
Open ChatGPT in your browser and log in. In the bottom left corner, click your profile and open **Settings**.
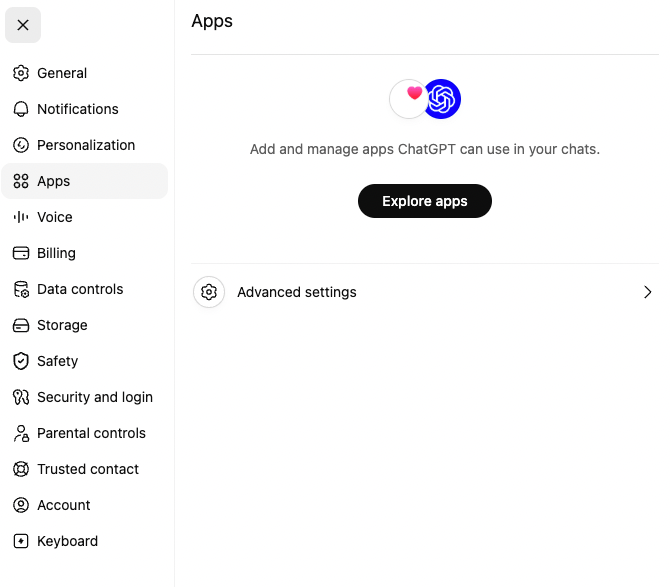
 In the settings, choose **Apps** in the navigation and go to **Advanced Settings**.
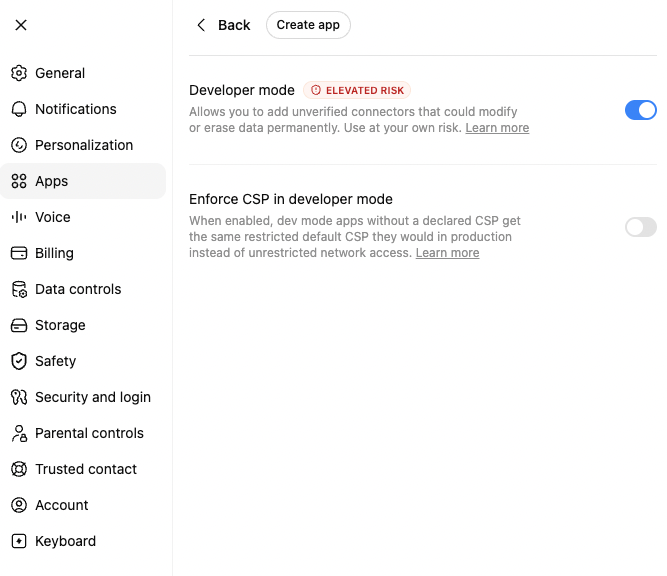
 Enable **Developer Mode** and then click on **Create App** at the top to start the Qontext connection flow.
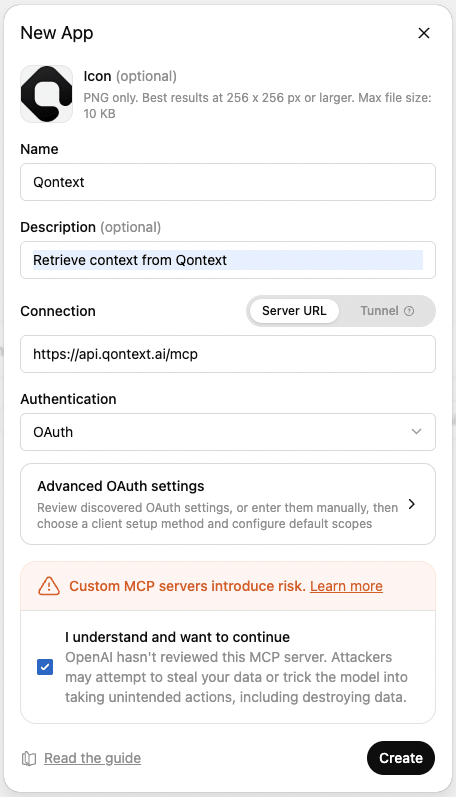
 Fill in the details for your new app. You can see an example below. Use the following **MCP server URL**.
```text theme={null}
https://api.qontext.ai/mcp
```
Fill in the details for your new app. You can see an example below. Use the following **MCP server URL**.
```text theme={null}
https://api.qontext.ai/mcp
```
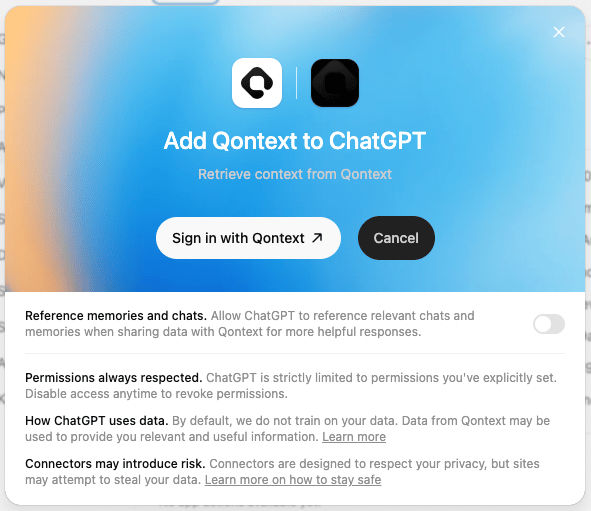
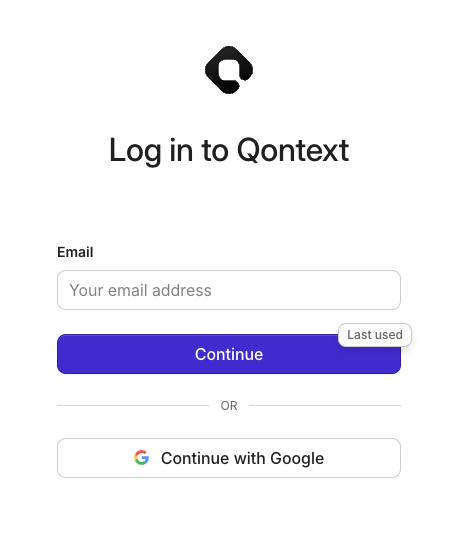 When prompted, allow ChatGPT access to Qontext.
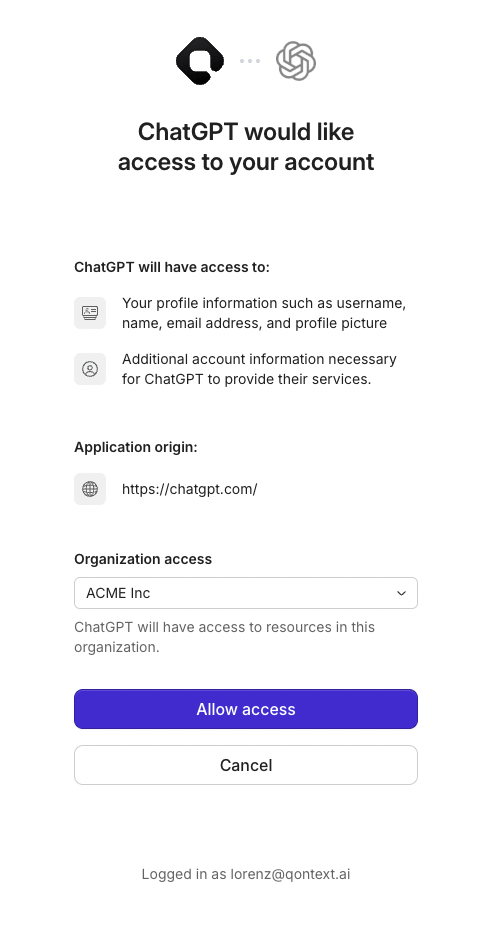
From now on, ChatGPT will use your context repository to retrieve context when you invoke Qontext.
***
## Using Qontext in ChatGPT
Once the app is set up, using Qontext is simple:
Open a new conversation in ChatGPT.
Type **@Qontext** or **Use Qontext** in your message to let ChatGPT retrieve the context needed to give you the best answer.
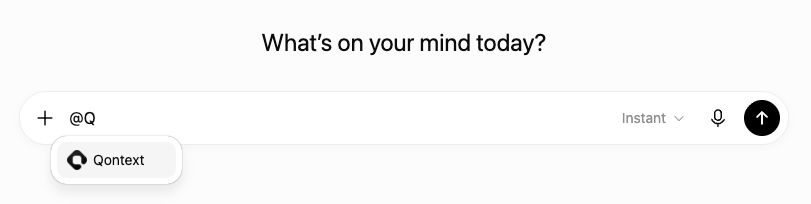 Add your question or task and send the message.
ChatGPT automatically retrieves relevant context from your connected context repository to complete the task.
### Example prompts
```text theme={null}
@Qontext, what were the key takeaways from last week's sales meeting?
```
```text theme={null}
Summarize what we know about Acme Corp. @Qontext
```
```text theme={null}
@Qontext, draft a follow-up email to Charles Renner from ACME Inc.
```
```text theme={null}
@Qontext, find our pricing guidelines and help me draft a proposal.
```
***
## Troubleshooting
A few things to check:
* Check your account: custom apps are not available on free plans.
* Make sure you can see the app under Settings → Apps. If not, your workspace admin may need to approve it first.
* Ensure **Developer Mode** is on under Settings → Apps → Advanced Settings.
Your admin or owner may need to enable Developer Mode if you're using ChatGPT Business or Enterprise.
***
## Need help?
If you encounter issues with the ChatGPT connection, reach out at [support@qontext.ai](mailto:support@qontext.ai).
Add your question or task and send the message.
ChatGPT automatically retrieves relevant context from your connected context repository to complete the task.
### Example prompts
```text theme={null}
@Qontext, what were the key takeaways from last week's sales meeting?
```
```text theme={null}
Summarize what we know about Acme Corp. @Qontext
```
```text theme={null}
@Qontext, draft a follow-up email to Charles Renner from ACME Inc.
```
```text theme={null}
@Qontext, find our pricing guidelines and help me draft a proposal.
```
***
## Troubleshooting
A few things to check:
* Check your account: custom apps are not available on free plans.
* Make sure you can see the app under Settings → Apps. If not, your workspace admin may need to approve it first.
* Ensure **Developer Mode** is on under Settings → Apps → Advanced Settings.
Your admin or owner may need to enable Developer Mode if you're using ChatGPT Business or Enterprise.
***
## Need help?
If you encounter issues with the ChatGPT connection, reach out at [support@qontext.ai](mailto:support@qontext.ai).