Overview
The Confluence connection allows Qontext to read pages and blog posts from a connected Confluence instance and ingest their text content into your context repositorycontext repository.Only spaces and pages that the connected Confluence account can access will be ingested into your context repositorycontext repository.
| Object | Description |
|---|---|
Pages | Confluence pages including nested child pages |
Blog posts | Blog posts published within Confluence spaces |
Comments | Footer and inline comments, fetched and appended to their parent page or blog post |
Tasks | Tasks on pages, fetched and appended to the parent page content |
Comments and tasks are not ingested as standalone items. They are included in the content body of their parent page or blog post.
| Object | Description |
|---|---|
Attachments | Files attached to pages (e.g. images, PDFs, spreadsheets) |
Databases | Confluence databases |
Whiteboards | Confluence whiteboards and visual collaboration content |
Recommended setup
Use a dedicated integration user in your Confluence instance to ensure a stable and uninterrupted connection.
The integration user will:
- Authenticate the connection between Qontext and Confluence.
- Access shared spaces and pages with read-only permissions.
Setting up the connection
You can connect Confluence from your Qontext workspaceworkspace, authorize access in Confluence, then choose what to sync and how often. The steps below walk you through the full flow.You can also manage all your credentials, including Confluence, from the Sources tab.
Open Sources in your workspace
In the Qontext app, open your workspace and go to the Sources tab, then click + Connect data source.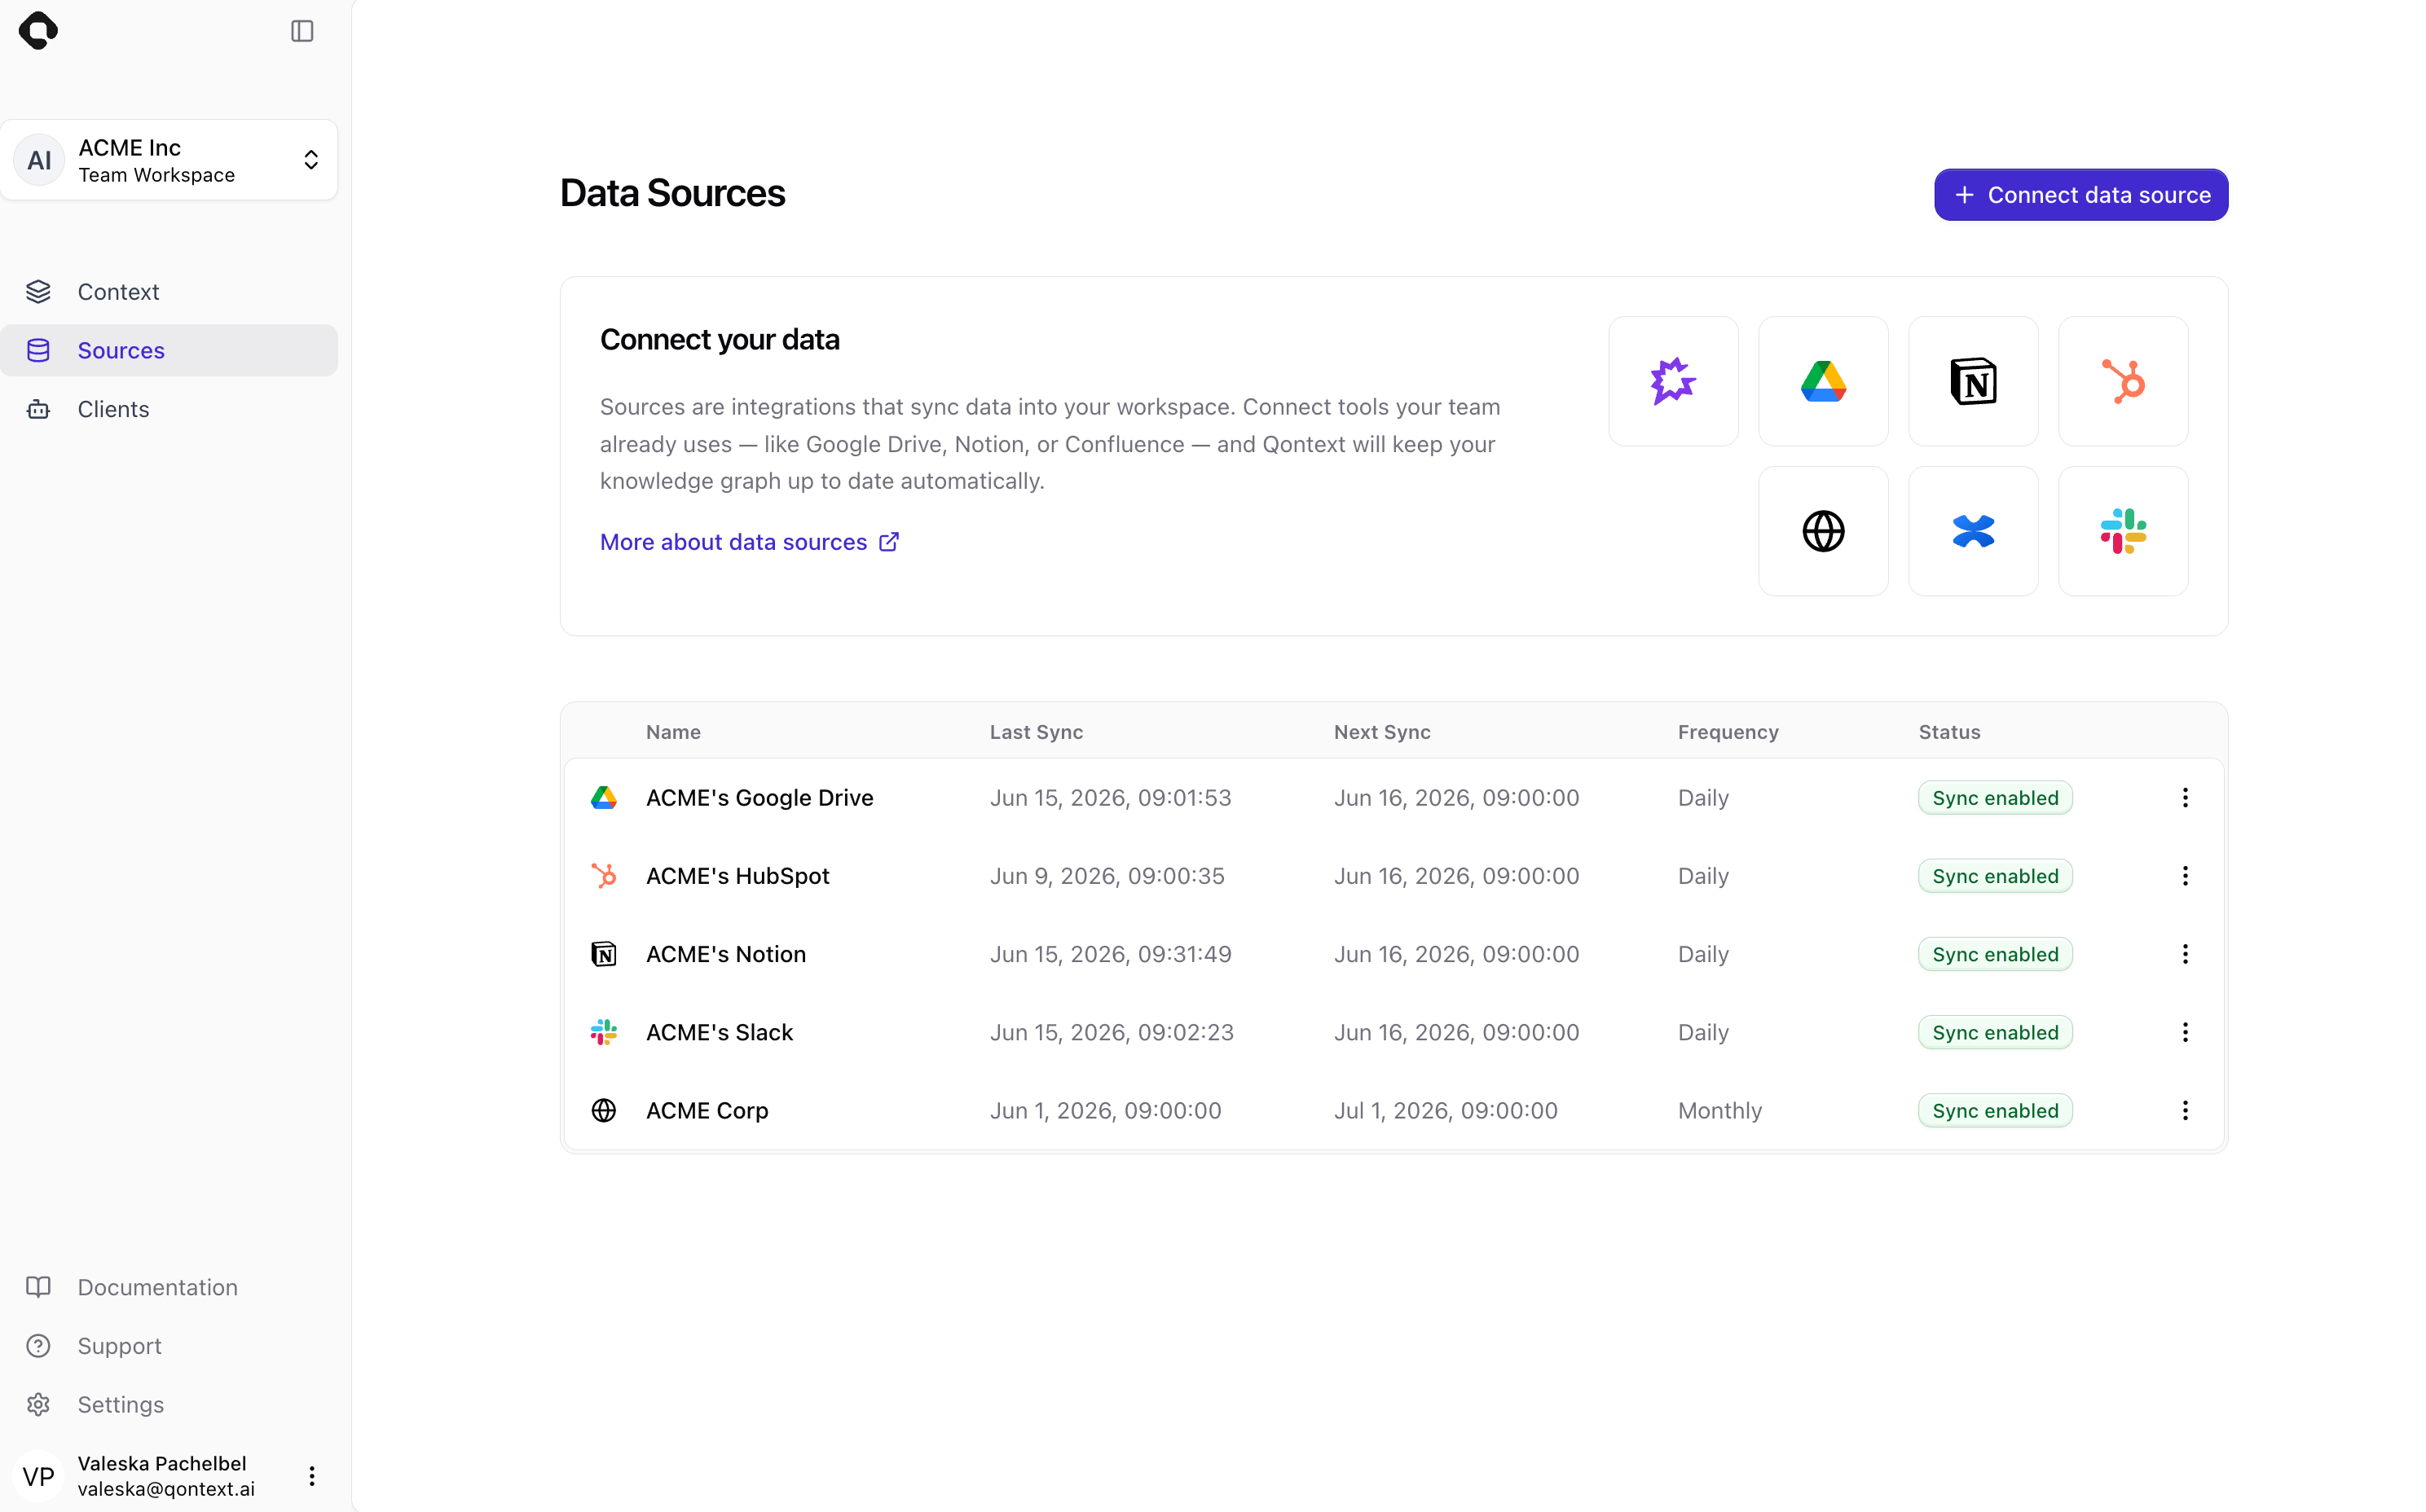
Connect your Confluence account
You can reuse existing Confluence credentials (if you’ve already connected this account to Qontext) or create a new connection.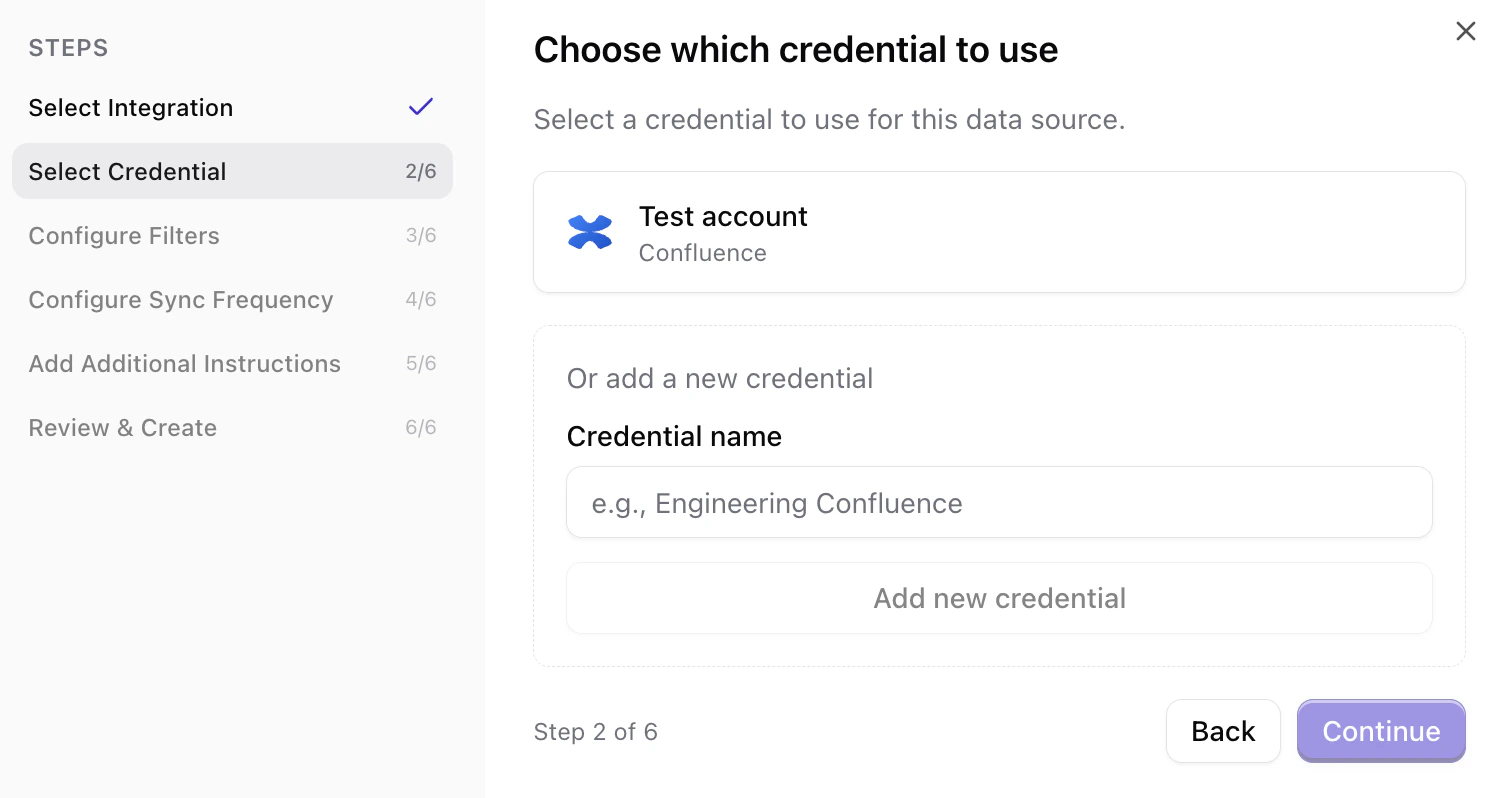
Configure what to sync (filters)
Select the spaces and pages you want Qontext to ingest into your context repository. Use the search bar to find specific spaces and pages or navigate through the list.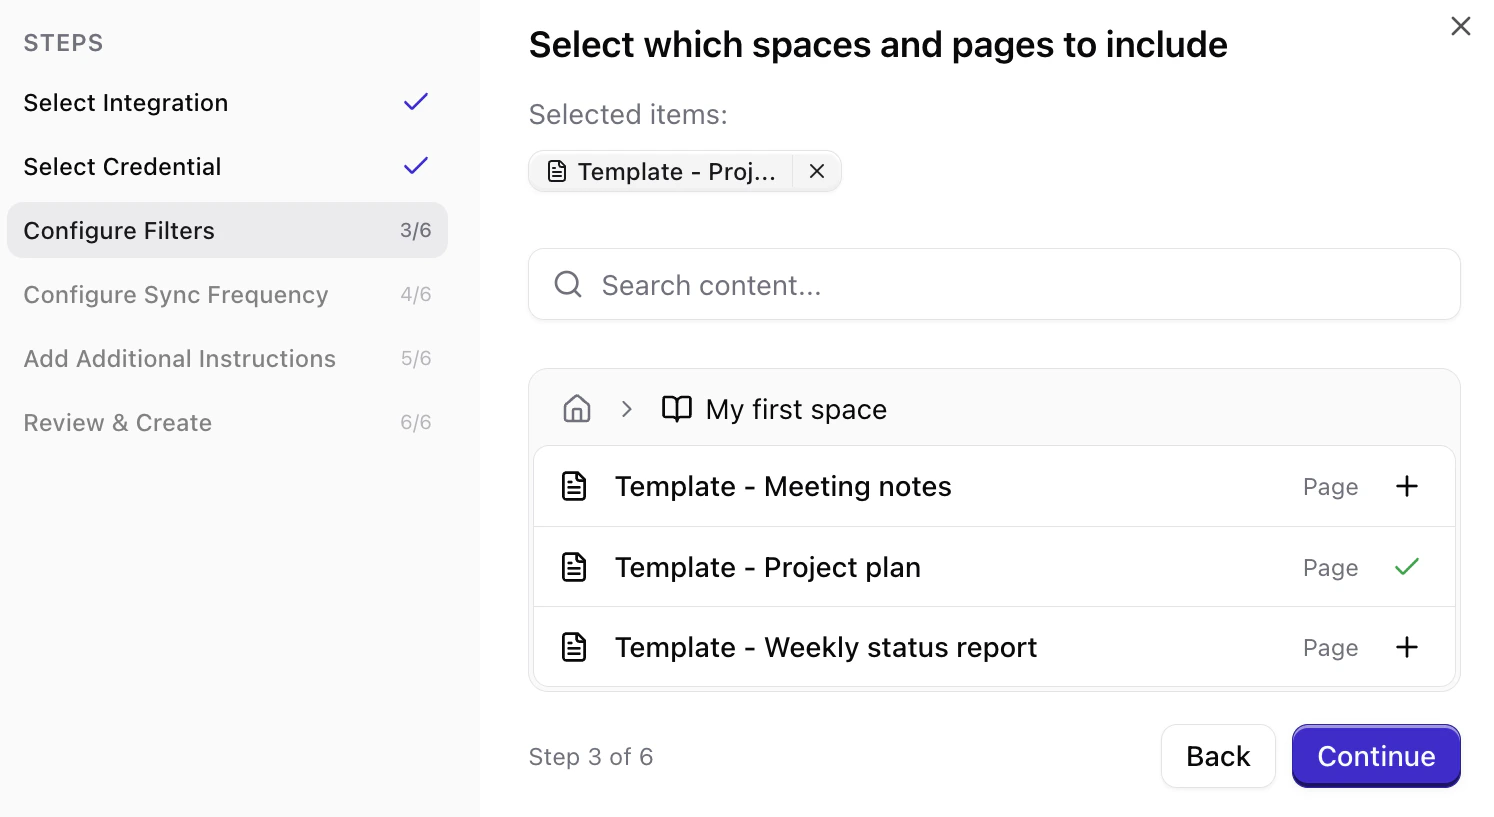
Set sync frequency
Choose how often Qontext should refresh data from Confluence (e.g. daily, weekly, monthly). More frequent syncs keep the context repositorycontext repository up to date but use more resources.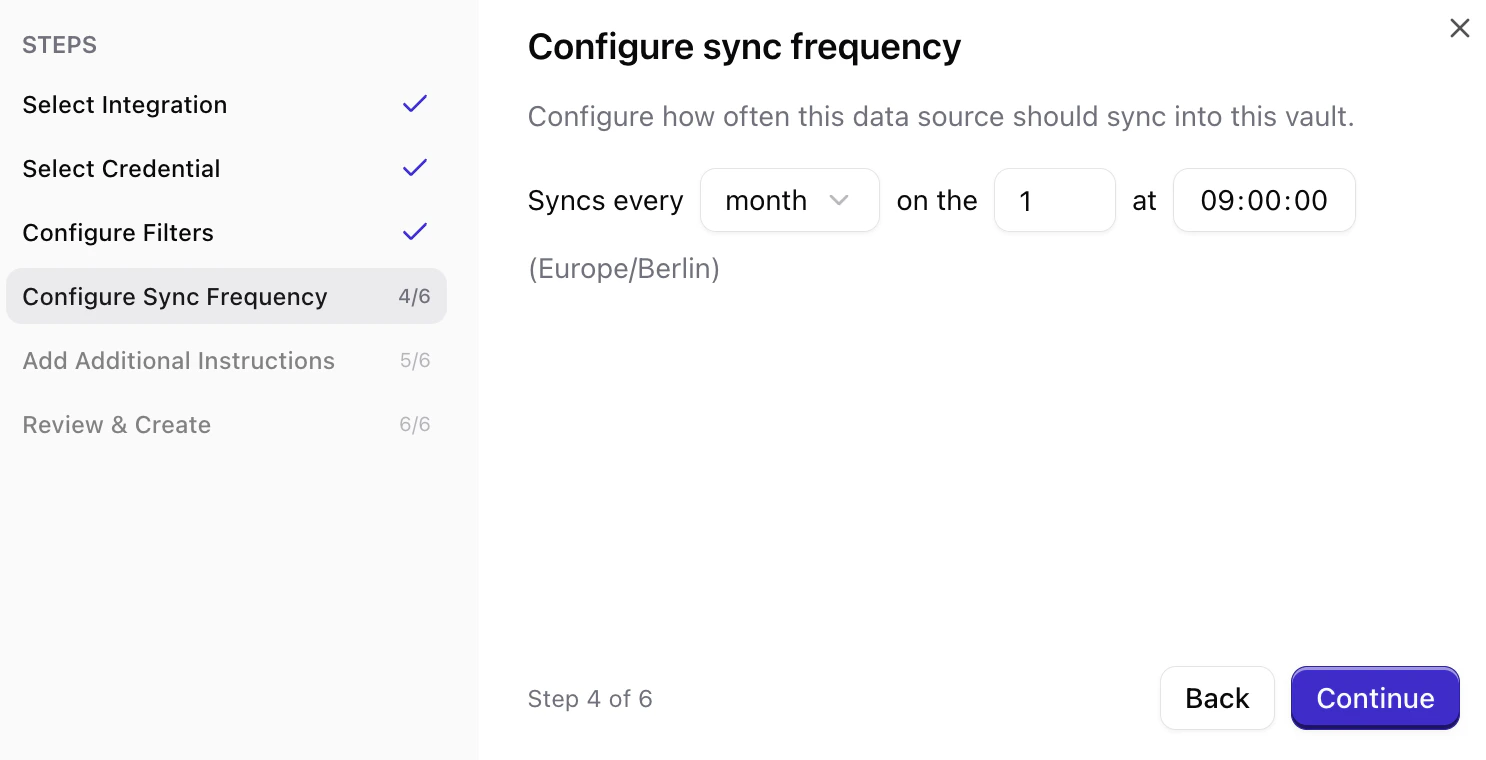
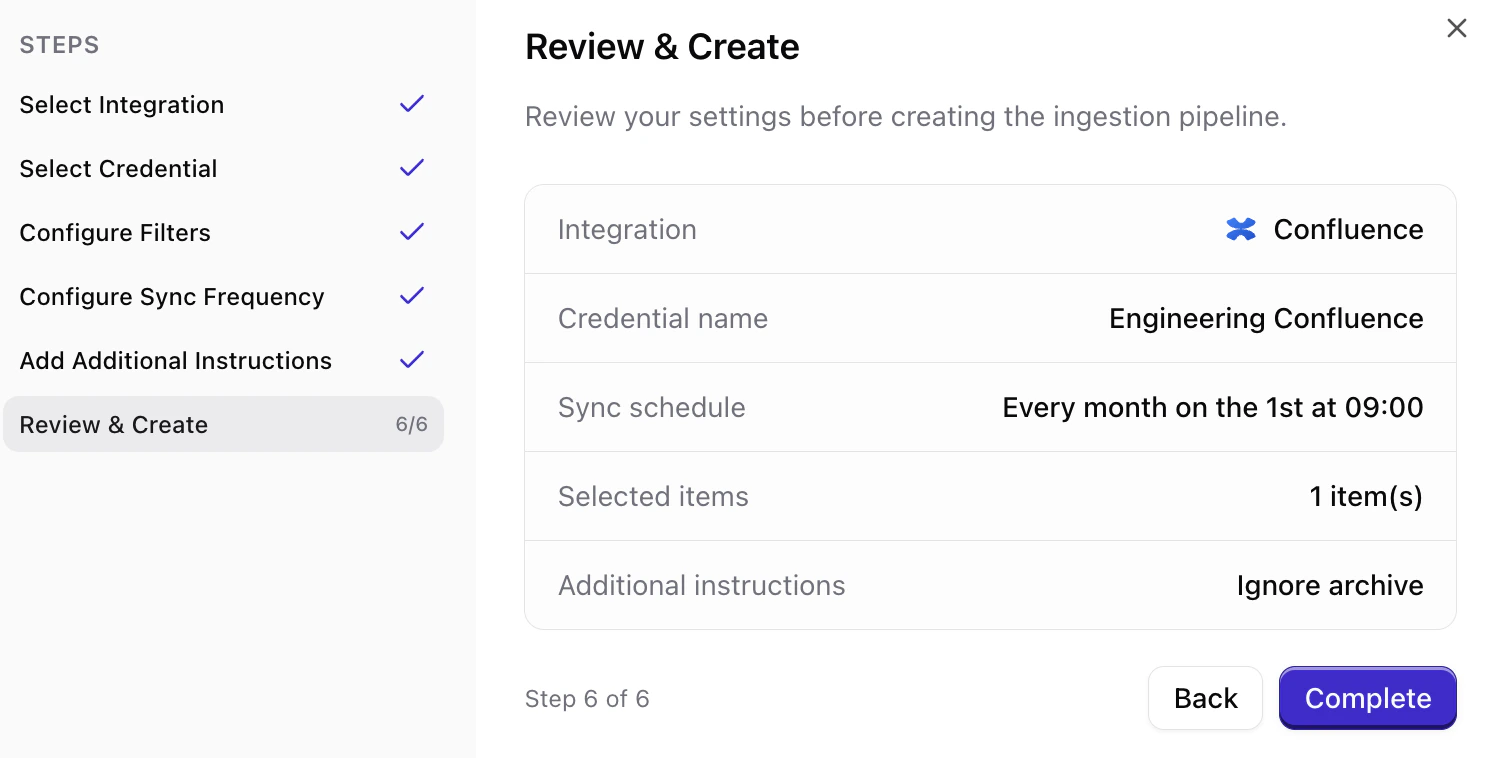
Set ingestion instructions (optional)
You can add source instructions that tell Qontext how to interpret or prioritize the synced data. This step is optional.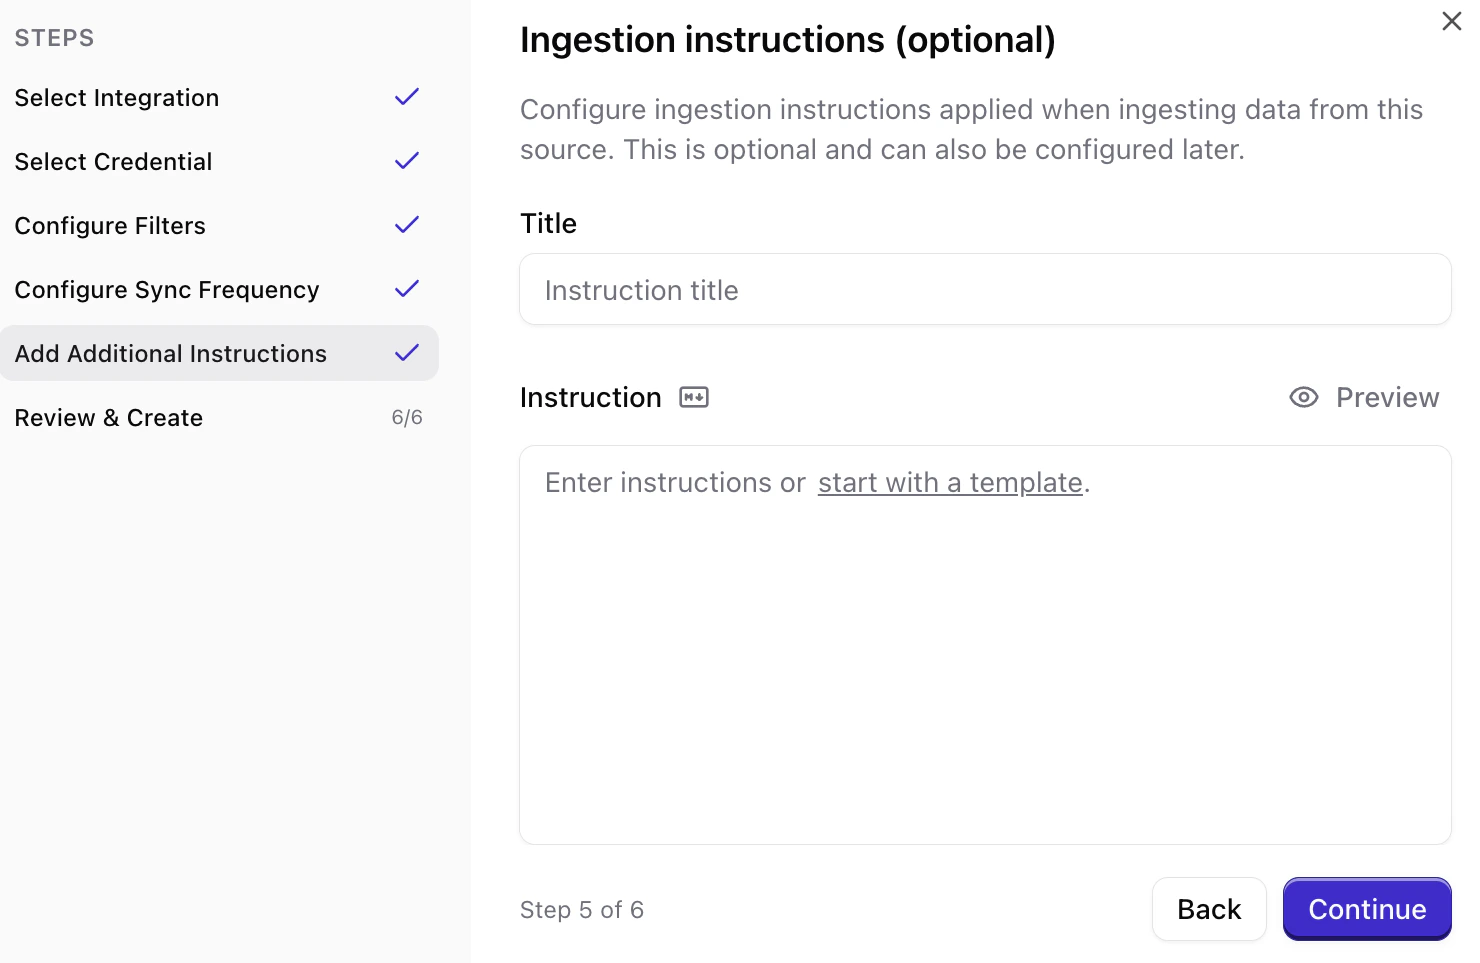
Managing permissions
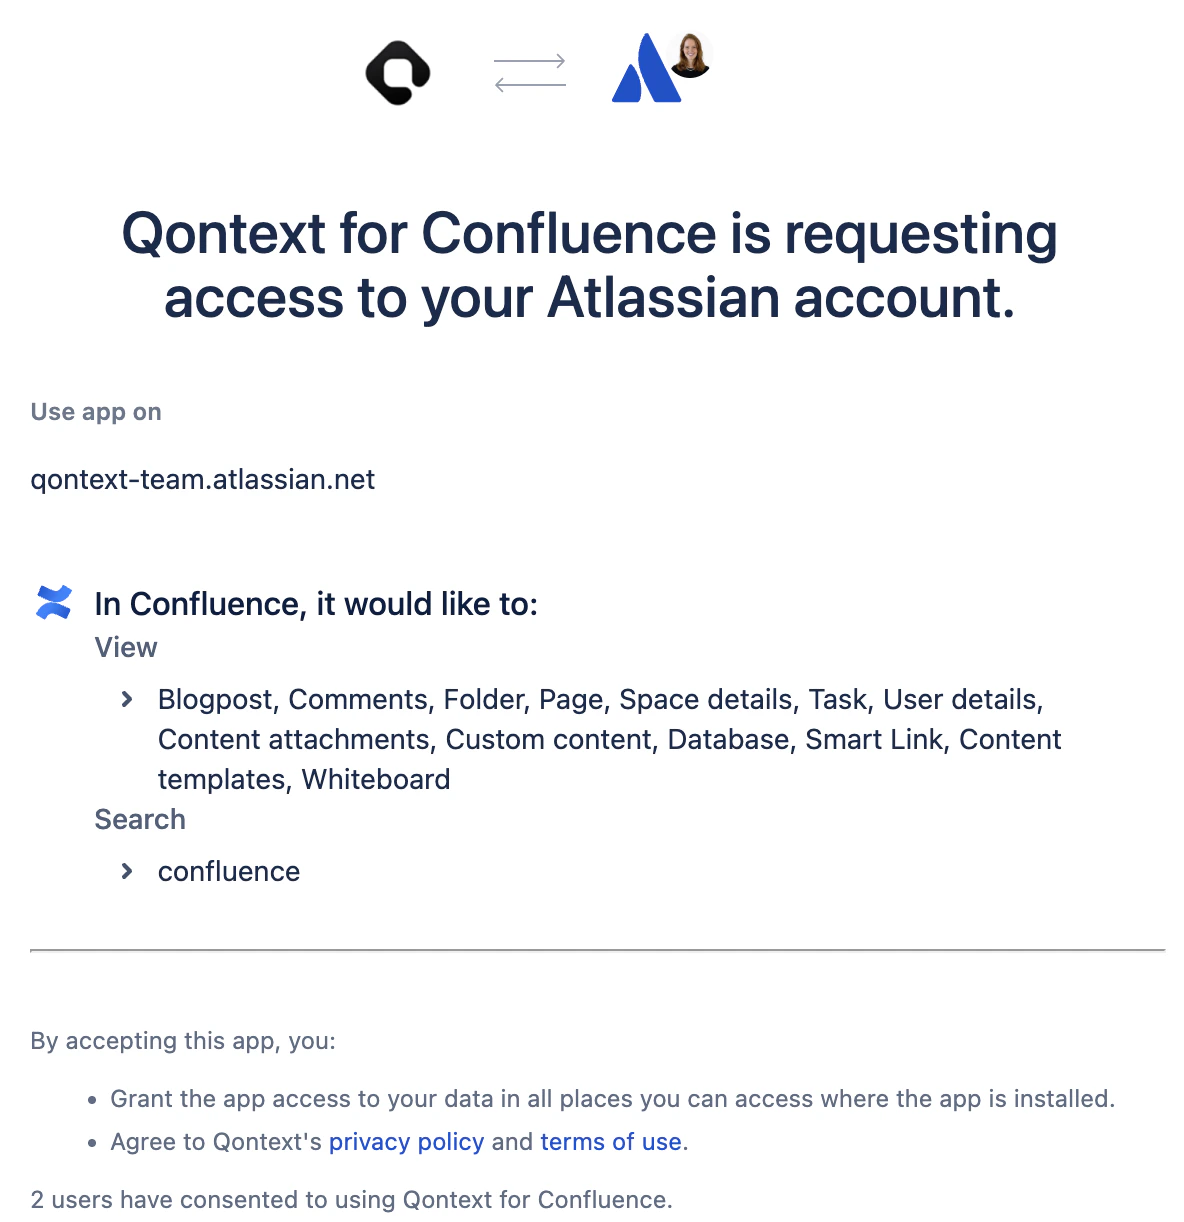
Confluence OAuth scopes
When connecting, you will see a consent screen titled Qontext for Confluence is requesting access to your Atlassian account. It lists the permissions Qontext needs; they are read-only. You’ll see categories such as:Confluence permissions
- Use a single integration user to manage Confluence access for Qontext to avoid permission conflicts.
- If you don’t see a space or page during filter setup, verify that the connected account has permission to view it in Confluence.
Sync latency
The initial sync time depends on the number of spaces and pages in scope. Large Confluence instances with many pages can take up to 12 hours to fully index.Subsequent syncs process incremental changes and typically complete much faster than the initial sync.
FAQ
Who can set up the Confluence connection?
Who can set up the Confluence connection?
Any user with Confluence access and permission to authorize third-party apps can set up the connection. We recommend using a dedicated service account with stable access to the spaces you want to ingest.
Does Qontext support Confluence Data Center (on-premise)?
Does Qontext support Confluence Data Center (on-premise)?
Qontext currently supports Confluence Cloud only. If you use Confluence Data Center, contact support@qontext.ai to discuss your options.
Can I connect multiple Confluence sites?
Can I connect multiple Confluence sites?
Yes. You can create multiple Confluence connections from the Sources tab in your Qontext workspace. Add each site as a separate data source. You can also manage all your credentials from the SourceSources tab in your Qontext workspace. Add each site as a separate data source. You can also manage all your credentials from the Sources page.
How do I manually refresh Confluence data?
How do I manually refresh Confluence data?
Manual refresh for Confluence connections is available via the Sources tab. Navigate to the respective Confluence connection and open the Syncs tab. In the Sync settings, you can select Resync all data.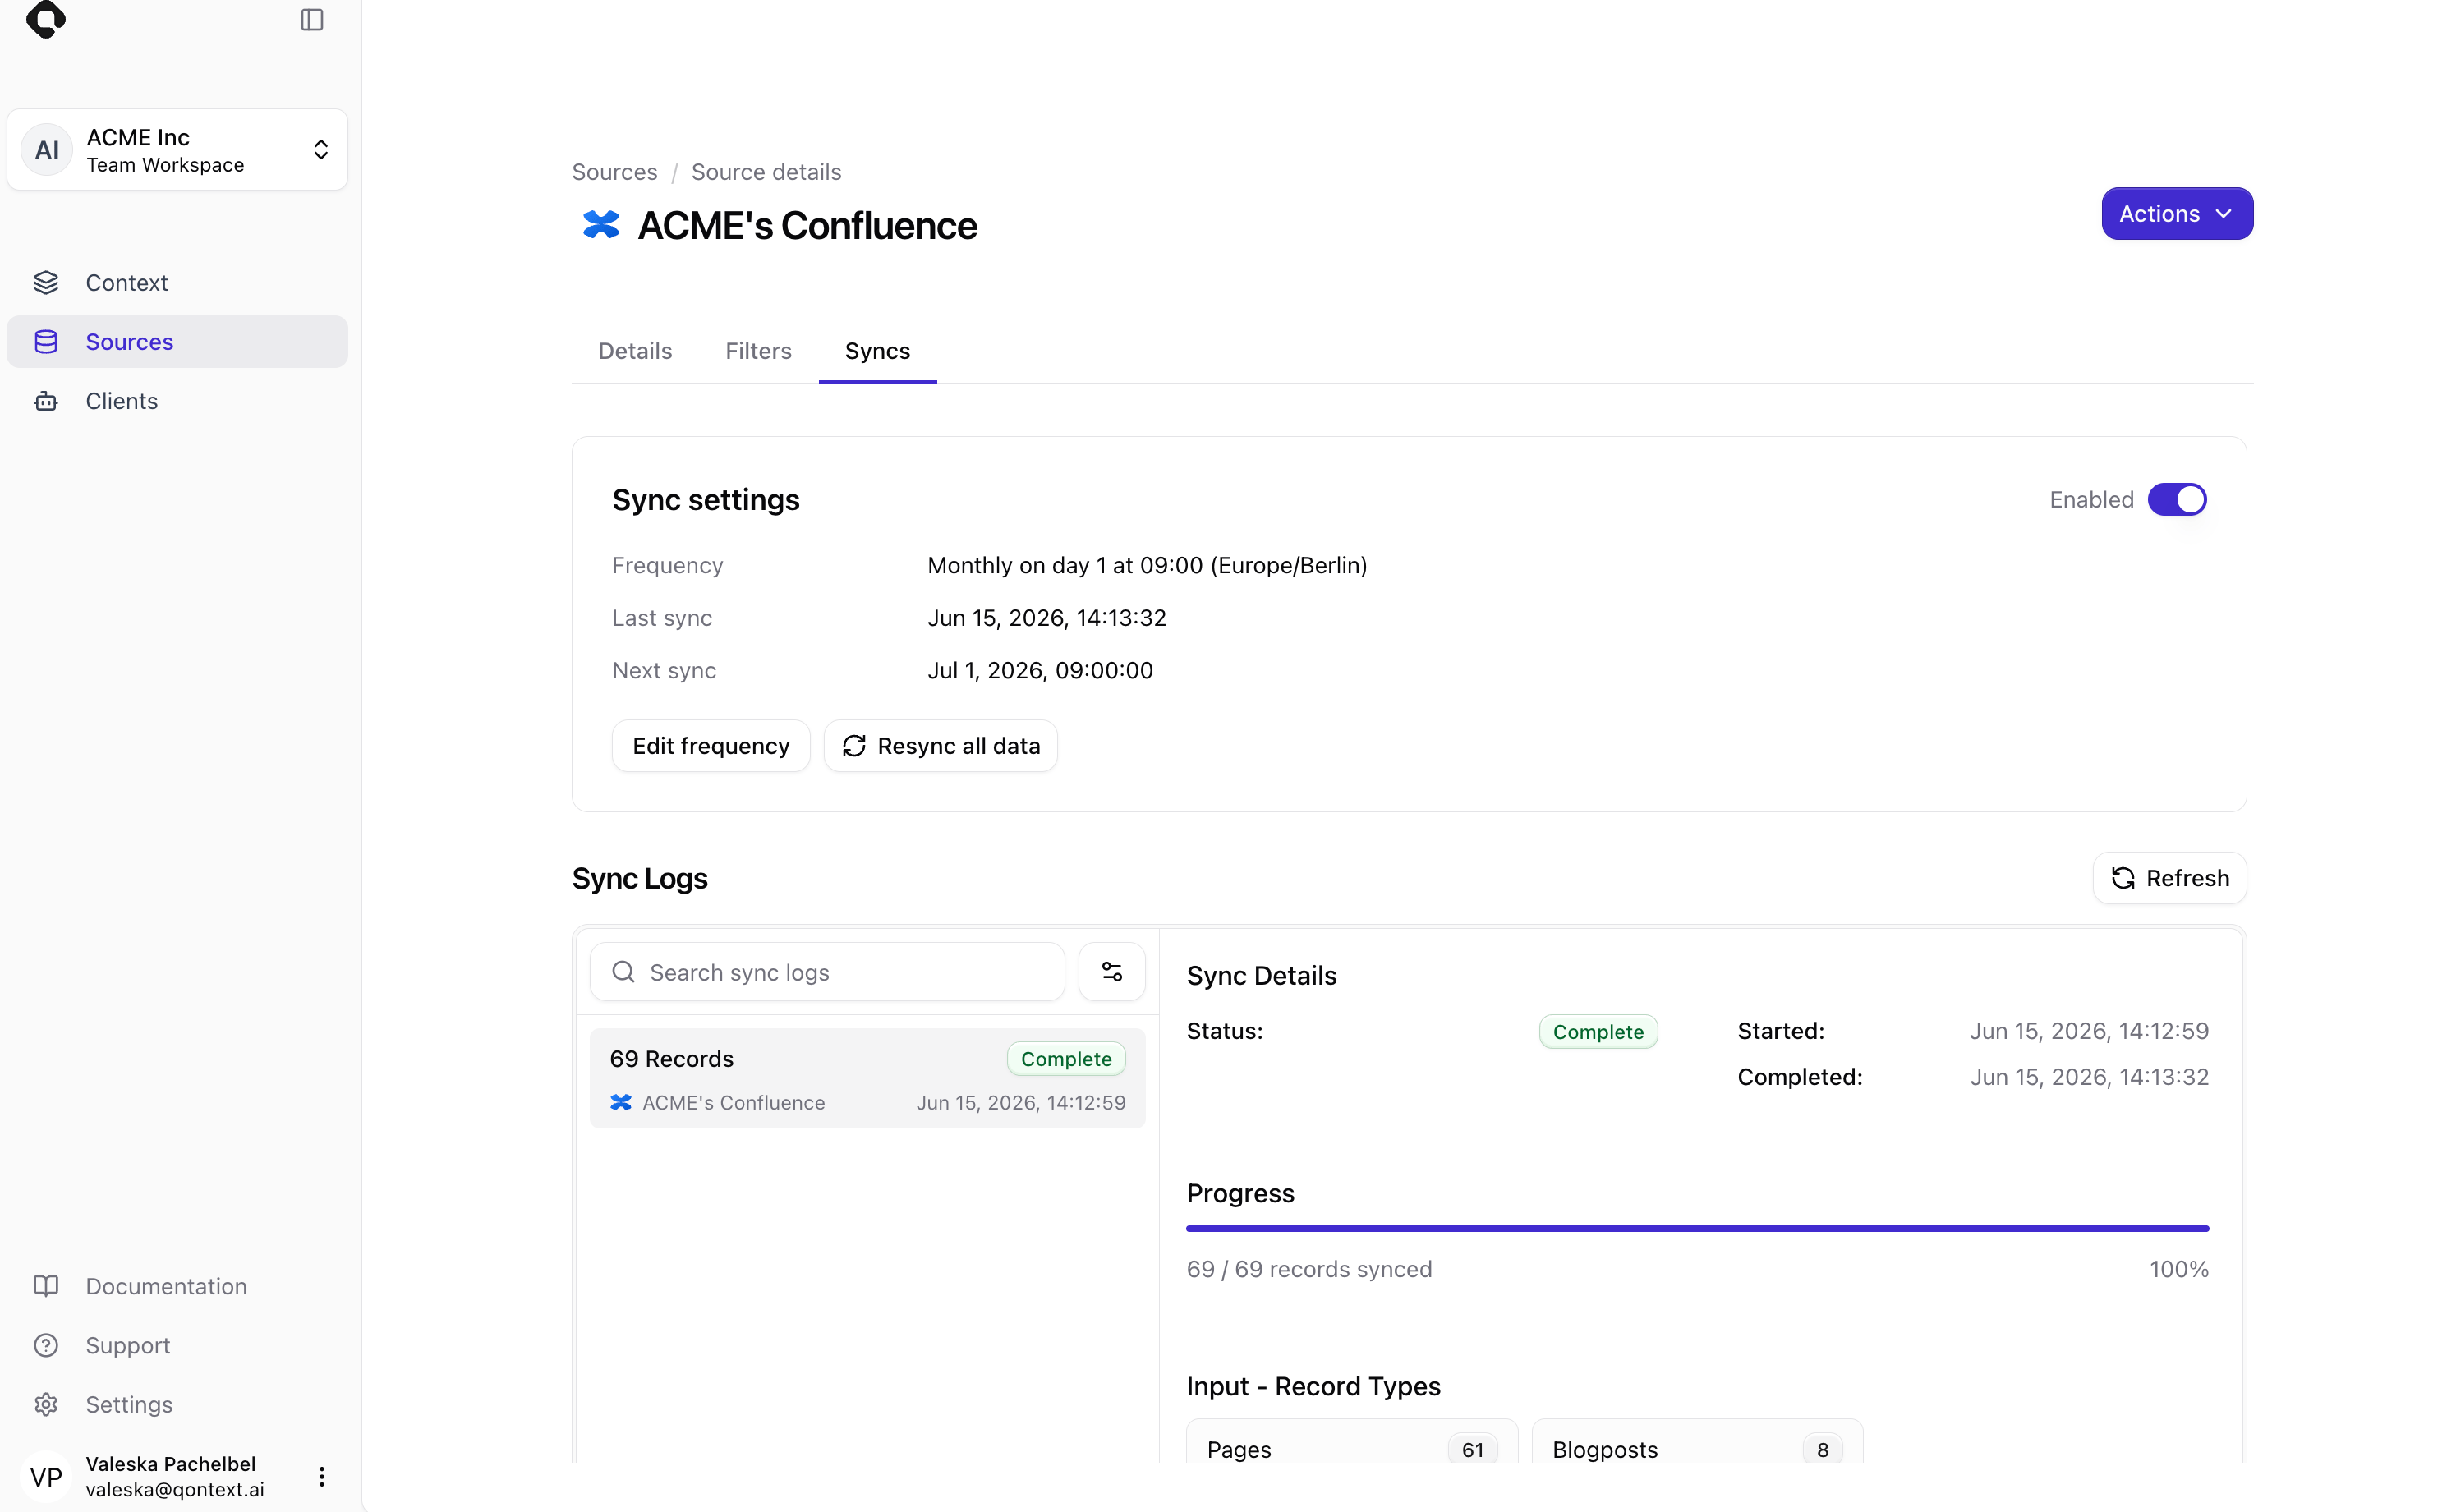
How do I manually refresh Confluence data?
How do I manually refresh Confluence data?
Manual refresh for Confluence connections is available via the Sources tab. Navigate to the respective Confluence connection and open the Syncs tab. In the Sync settings, you can select Resync all data.
What happens if I disconnect Confluence?
What happens if I disconnect Confluence?
Disconnecting stops further syncs. Content already ingested from Confluence remains in your context repositorycontext repository. For data removal, contact support@qontext.ai.
How long does the first sync take?
How long does the first sync take?
Initial sync time varies: small instances may finish in under an hour; large instances with many spaces and pages can take up to 12 hours. Subsequent syncs are incremental and faster.
Is my Confluence data secure?
Is my Confluence data secure?
Yes. All data is encrypted in transit (TLS). Qontext only accesses spaces and pages you explicitly authorize via the Atlassian OAuth flow
How can I limit what Qontext accesses?
How can I limit what Qontext accesses?
By default, Qontext only ingests content the connected account can access. Additionally, you can add filters to every connection as described in the setup flow.
Are page restrictions respected?
Are page restrictions respected?
Yes. Confluence page-level and space-level restrictions are respected. Qontext can only access content visible to the connected account.
What should I do if my Confluence sync fails?
What should I do if my Confluence sync fails?
Go to the Sources page, find your Confluence credentials, and use the action dropdown to ValidateSources page, find your Confluence credentials, and use the action dropdown to Validate that it is still valid. If the credential is expired or broken, select Reconnect. Also verify that the connected account still has access to the required spaces. If the issue persists, contact support@qontext.ai.