

Overview
The Slack connection allows Qontext to read messages and threads from channels in a connected Slack workspace and ingest their text content into your context repository.Only channels and content that the connected Slack app can access will be ingested into your context repository.
Slack can also work in the other direction. With Qontext Tag, you mention
@Qontext in a channel or thread and get answers from your context repository inside Slack. See Qontext Tag in Slack.Setting up the connection
You can connect Slack from your Qontext workspace, authorize access in Slack, then choose how often to sync. The steps below walk you through the full flow.1
Open Sources in your workspace
In the Qontext app, open your workspace and go to the Sources tab, then click + Connect data source.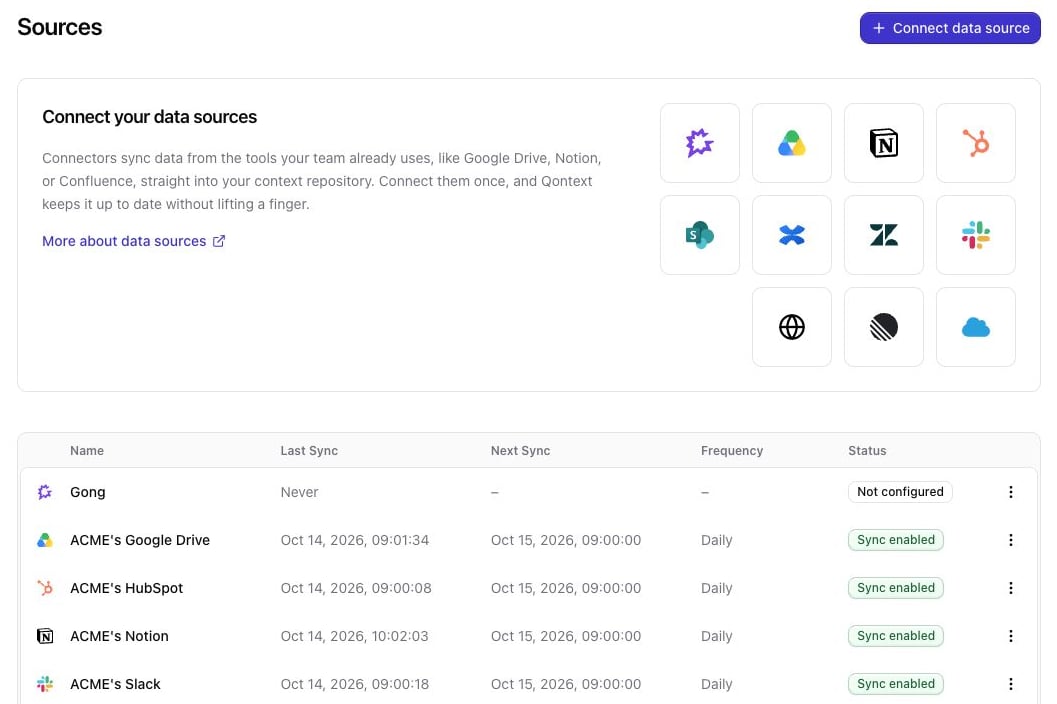
2
Select Slack as the data source
Choose Slack from the list of available data sources. This starts the Slack connection flow.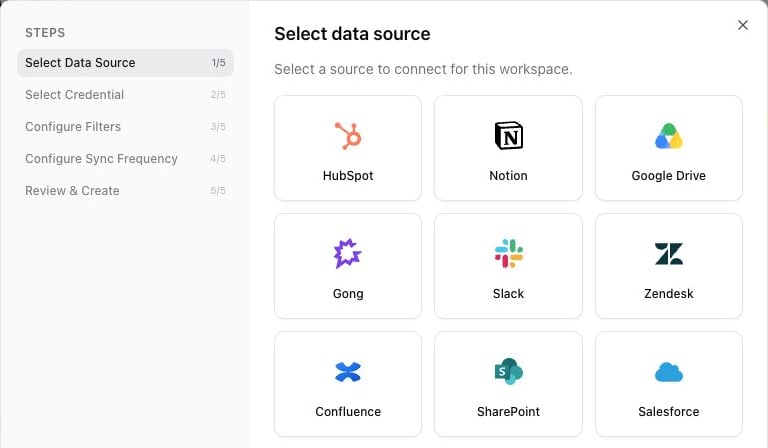
3
Connect your Slack workspace
You can reuse existing credentials (if you’ve already connected this Slack workspace to Qontext) or create a new connection.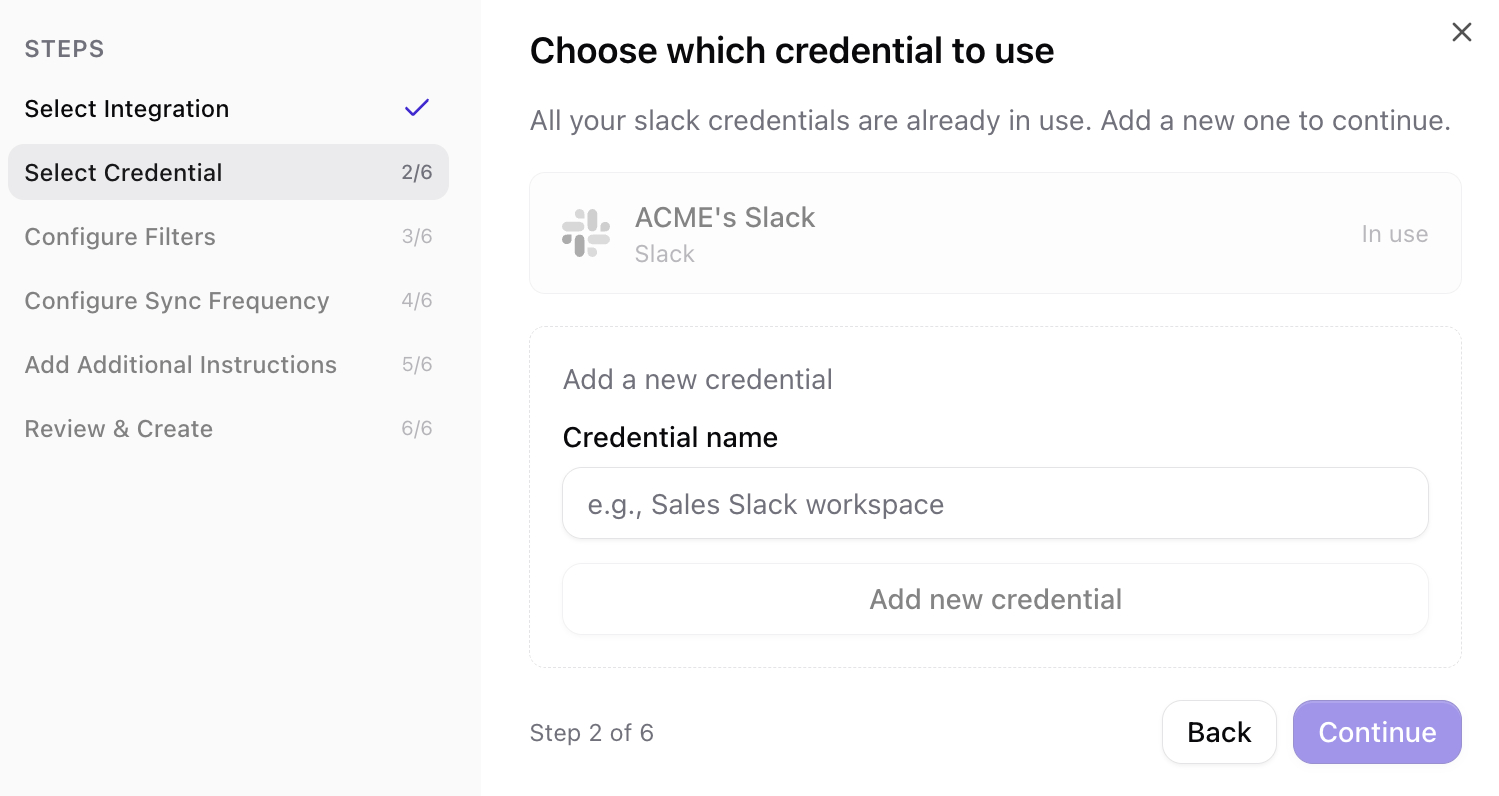
4
Configure what to sync (filters)
Select the channels you want Qontext to ingest. Only channels in which the Qontext app is a member can be ingested.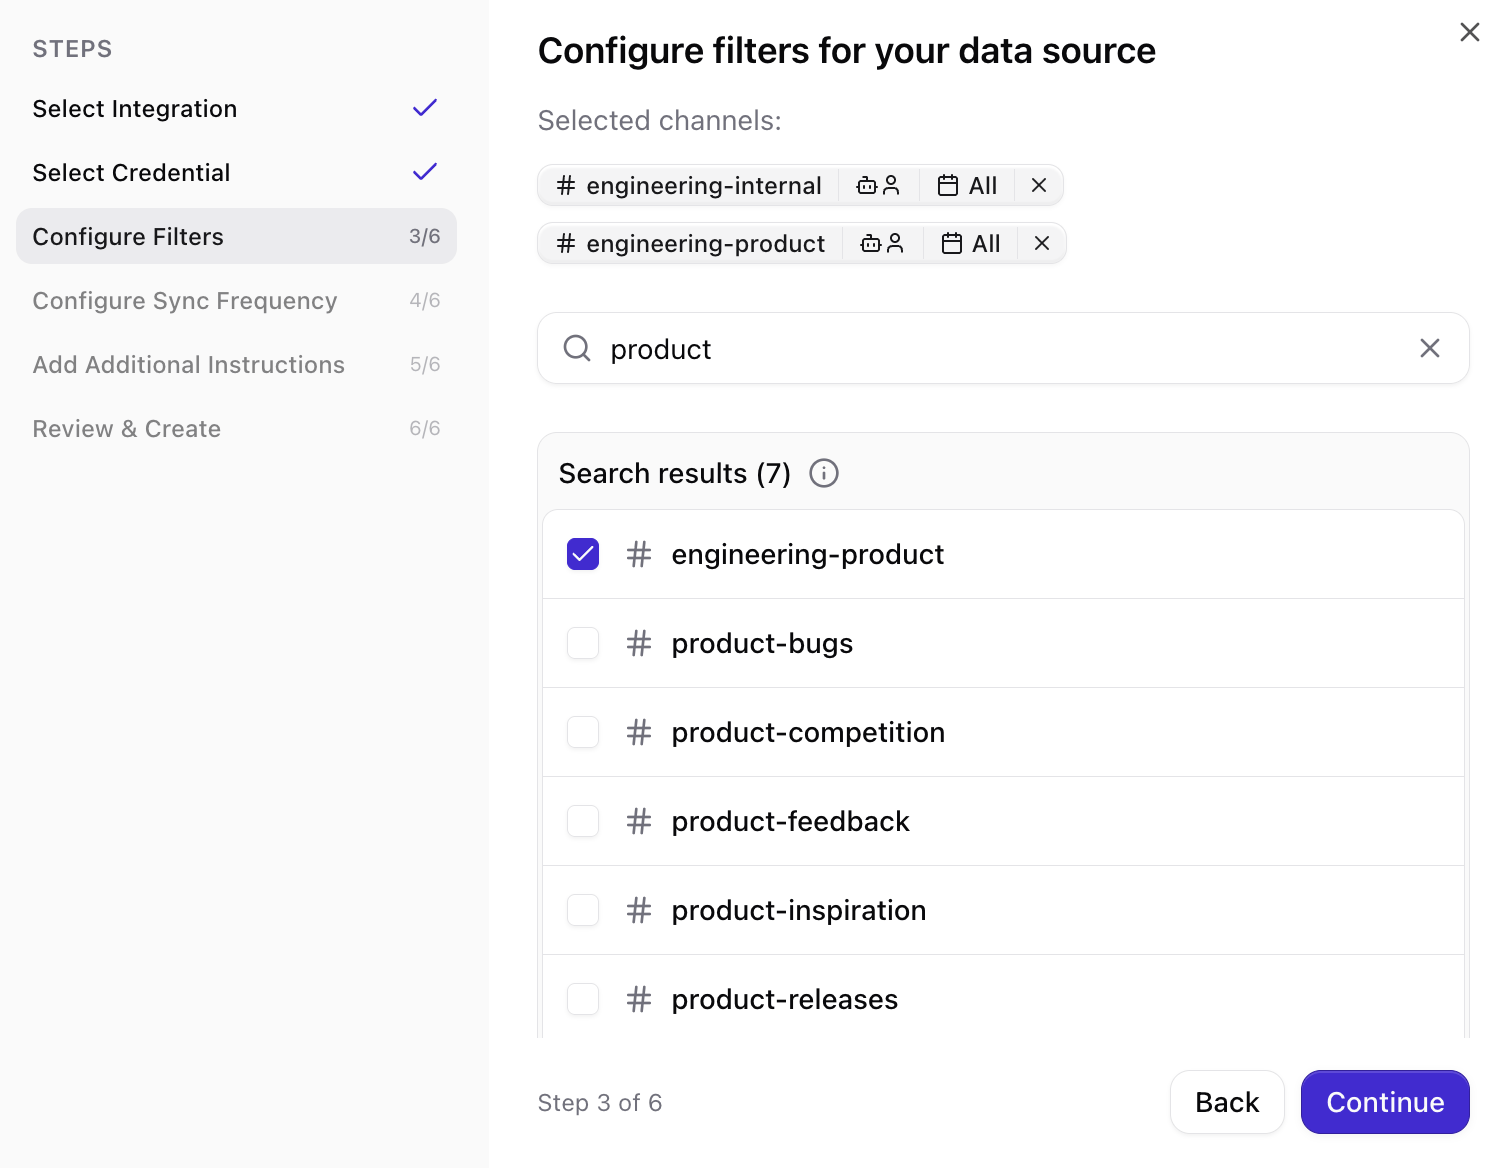
Public channels are automatically joined by the Qontext app when you select them.For private channels, the Qontext app must be added as a member first. In Slack, open the channel and type
/invite @Qontext.5
Set sync frequency
Choose how often Qontext should refresh data from Slack (e.g. daily, weekly, monthly). More frequent syncs keep the context repository up to date but use more resources.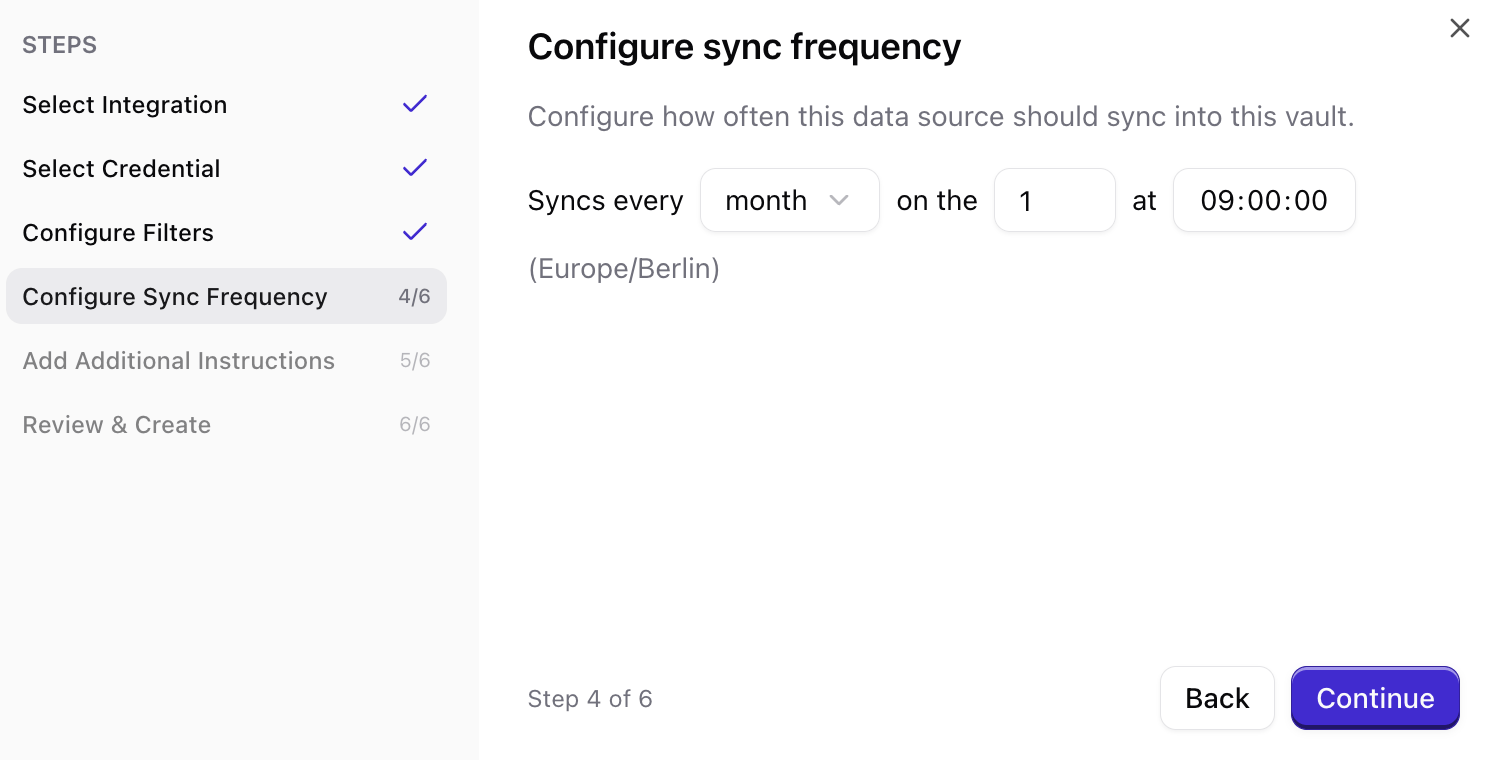
6
Review and create connection
Review your choices (workspace, channels, time filter, frequency), then confirm to create the connection. Qontext will start the initial sync shortly after.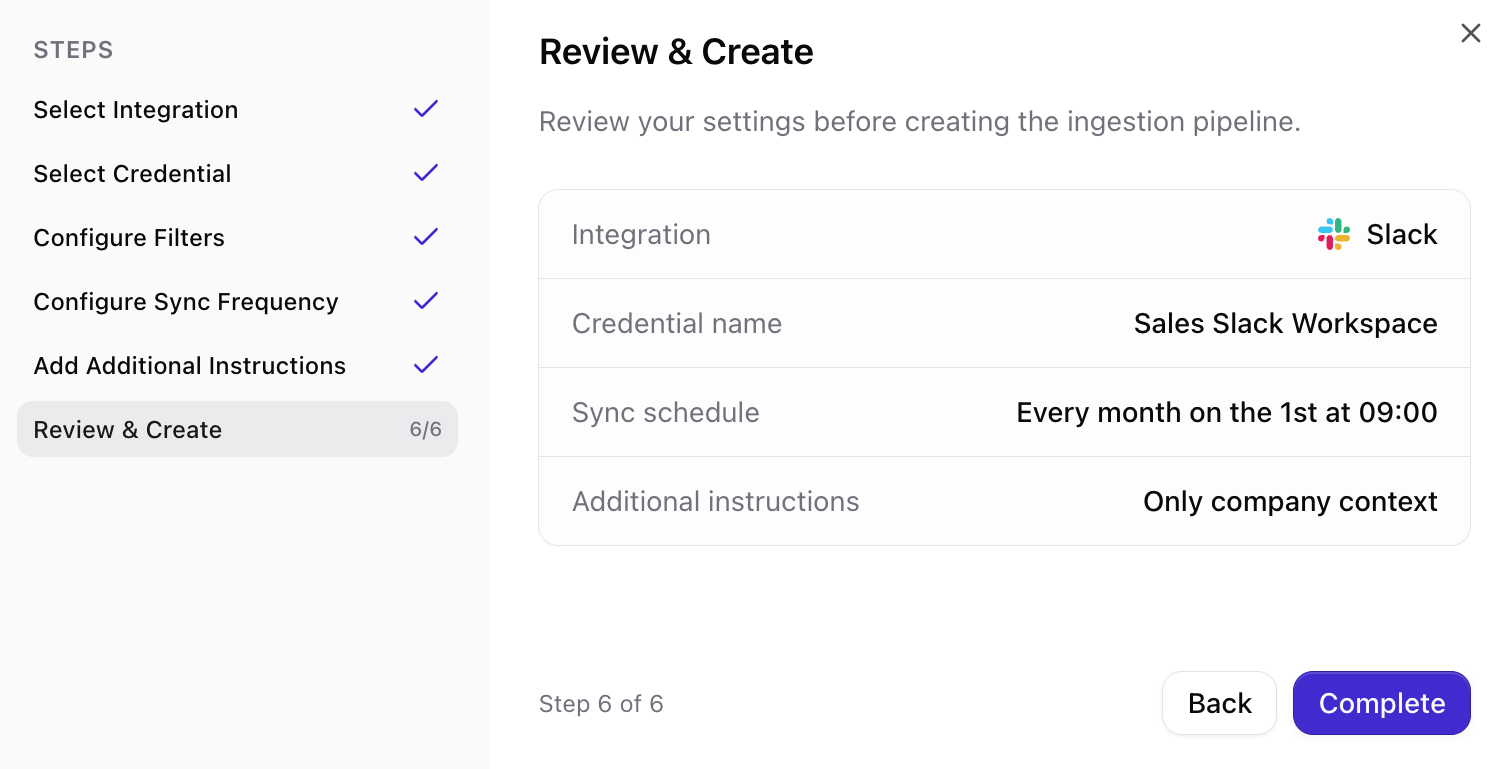
Use your own OAuth client
By default, Qontext connects to Slack through its own Slack app. If your organization needs the data source connection to go through a Slack app you own, you can use your own OAuth client instead. This applies to the Slack data source only: Qontext Tag keeps using the Qontext Slack app. You create the app in your Slack workspace and manage its approval and access yourself.Using your own OAuth client is off by default. To turn it on for your workspace, reach out at support@qontext.ai.
Adding your own OAuth client requires the Owner or Admin role in your Qontext workspace (see Member settings), and permission to create apps in your Slack workspace.
1
Copy the Redirect URI from Qontext
In the Qontext app, open your workspace and go to the Sources tab, then click + Connect data source. Select Slack, create a new connection, then expand Advanced and open Custom OAuth client. Copy the Redirect URI shown there. The manifest in the next step already uses 
https://app.qontext.ai/oauth/callback/slack. If the form shows a different value, use that one instead.2
Create the Slack app from a manifest
Go to api.slack.com/apps and click Create New App. Choose From a manifest and click Continue.In the JSON tab, replace the contents with the manifest below. Its 
redirect_urls entry is the Redirect URI from Qontext. Select the Slack workspace for the app, click Next, review the app, and click Create.The manifest declares these scopes for your app. Qontext requires all of them. If any is missing, the connection is not created. The manifest also turns on token rotation, so Qontext can refresh access to Slack automatically.
3
Copy the Client ID and Client Secret
In your new app, open Basic Information and scroll to App Credentials. Copy the Client ID and the Client Secret.
Treat the Client secret like a password. Qontext stores it encrypted and never shows it again after you save it.
4
Add the client to Qontext
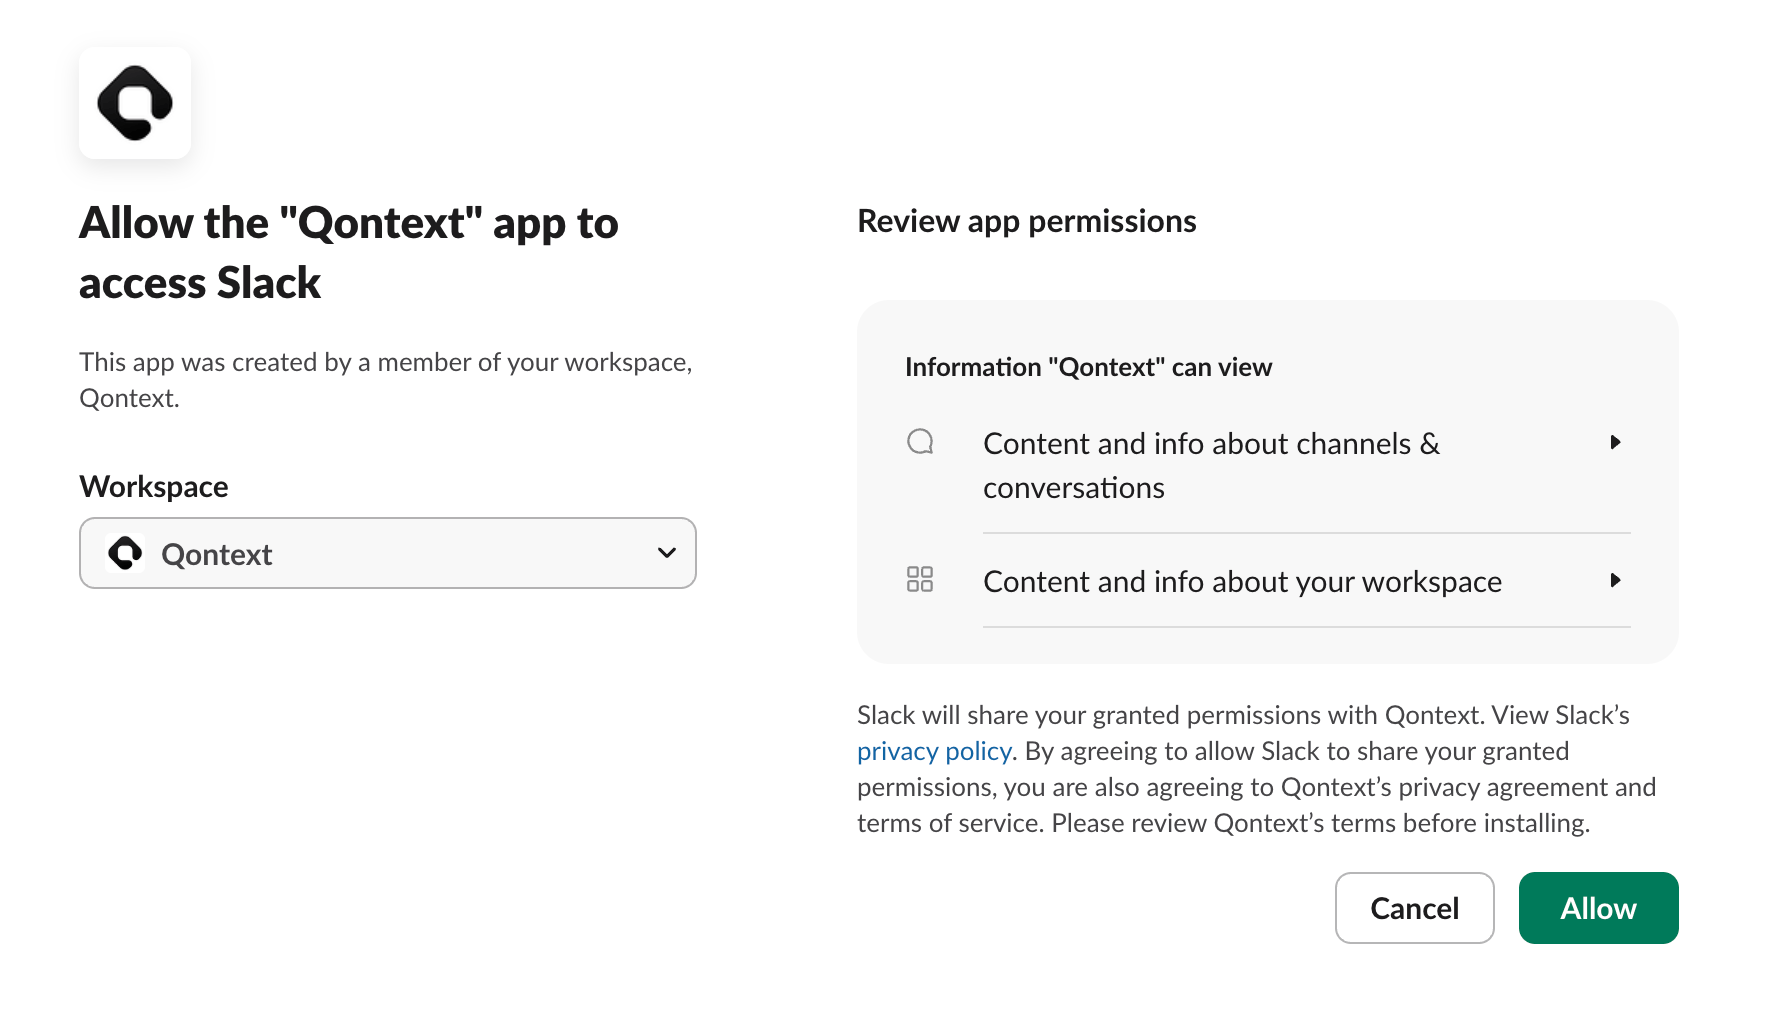
Back in the Custom OAuth client section of the connect form, paste the Client ID and Client secret, then continue. Sign in to Slack, select your workspace, and click Allow to approve the scopes. From here, the setup continues as described in Setting up the connection.
If you prefer to create the app manually, add the same scopes under OAuth & Permissions > Bot Token Scopes, add the Redirect URI under Redirect URLs, and opt in to token rotation with the Opt In button on the same page.
Troubleshooting a custom OAuth client
If the connection fails, Qontext shows a message with the error. Find it in the table below.
If the error persists, contact support@qontext.ai.
Managing permissions
Slack OAuth scopes
When you connect Slack, you’ll see a consent screen titled Allow the ‘Qontext’ app to access Slack. It lists the permissions (scopes) Qontext needs; they are read-only. You’ll see categories such as:Sync latency
The initial sync time depends on how many channels and messages are in scope. Large workspaces with many active channels can take up to 12 hours to fully index.Subsequent syncs process incremental changes and typically complete much faster than the initial sync.
FAQ
Who can set up the Slack connection?
Who can set up the Slack connection?
Any Slack workspace Admin or member with permission to install apps can set up the Slack connection. Ensure the account can invite the Qontext app to the channels you want to ingest.
Can I connect multiple Slack workspaces to one Qontext workspace?
Can I connect multiple Slack workspaces to one Qontext workspace?
Yes. You can connect multiple Slack workspaces from the Sources tab in your Qontext workspace. Add each workspace as a separate data source.
How do I manually refresh Slack data?
How do I manually refresh Slack data?
Manual refresh for Slack connections is available via the Sources tab. Navigate to the respective Slack connection and open the Syncs tab. In the Sync settings, select Sync latest data to pull recent changes, or Resync all data to rebuild the source from scratch.
What happens if I disconnect Slack?
What happens if I disconnect Slack?
Disconnecting stops further syncs. Content already ingested from Slack remains in your context repository. For data removal, contact support@qontext.ai.
How long does the first Slack sync take?
How long does the first Slack sync take?
Initial sync time varies: small or lightly used workspaces may finish in under an hour; very active workspaces with many channels and messages can take up to 12 hours. Subsequent syncs are incremental and faster.
What should I do if my Slack sync fails?
What should I do if my Slack sync fails?
Reconnect the integration and validate that the Qontext app is still invited to the relevant channels and has the required scopes. If you connected with your own OAuth client, see Troubleshooting a custom OAuth client. If the issue persists, contact support@qontext.ai.
Can I use my own Slack app?
Can I use my own Slack app?
Yes, for the Slack data source. Qontext Tag keeps using the Qontext Slack app. If your organization wants the connection to go through a Slack app you own, expand Advanced when you add a new connection and use Custom OAuth client. The setup is described in Use your own OAuth client. Qontext requires the same scopes as with its own app. This option is off by default. Reach out at support@qontext.ai to turn it on.
Is my Slack data secure?
Is my Slack data secure?
Yes. All data is encrypted in transit (TLS) and at rest. Qontext only accesses channels and messages you explicitly authorize via the Slack OAuth flow.
How can I connect to personal Slack channels?
How can I connect to personal Slack channels?
For private channels, the Qontext app must be added as a member first. In Slack, open the channel and type
/invite @Qontext.